Get More Reviews lets you send surveys and collect feedback from the people who matter most: your customers.
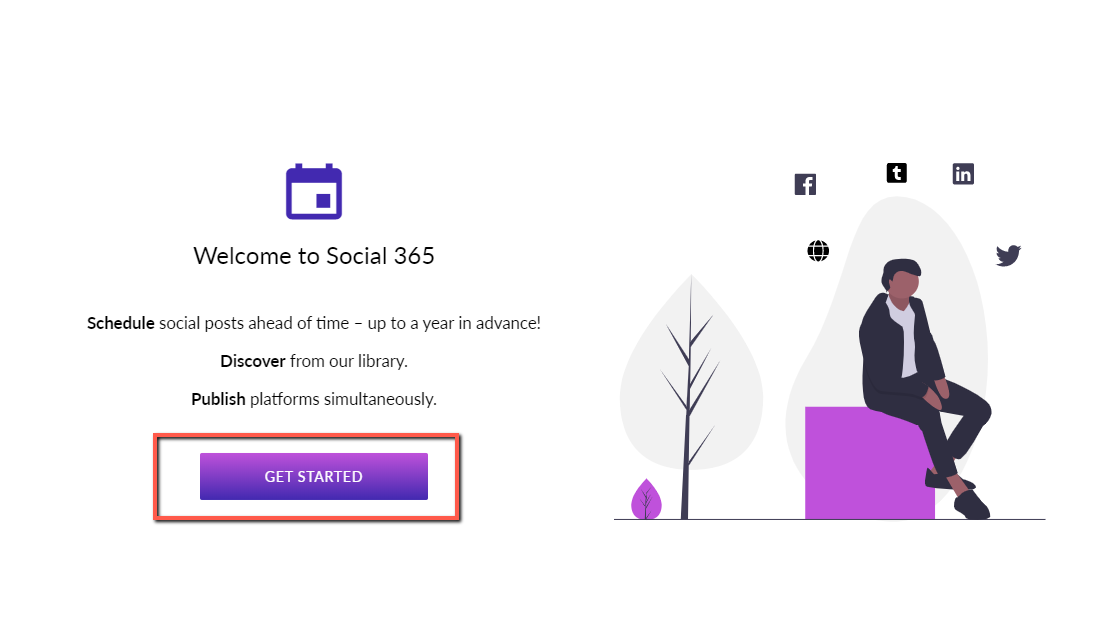
To start using this tool, log in to your account and select the “Get 5 Star Reviews” tile.


If you choose to set up Cloud Identity, domain verification is required.
To create a Google Cloud account:
Open Google Cloud Console in a browser.
When prompted to sign in, create a new account by clicking Create account:
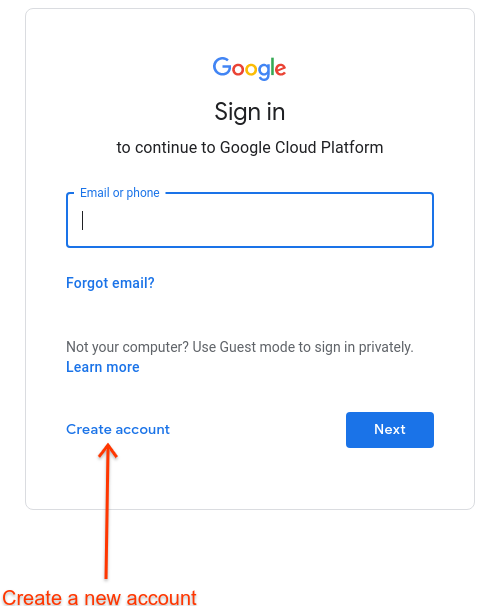
Follow the instructions to register your corporate email address as a Google account. Alternatively, you can use a Gmail account or other Google account.
Continue to the Google Cloud Console (click here), and accept the Google Cloud terms presented.
Step 2: Create a Google Cloud project
- Open the Google Cloud Console and log in with the account you created in Step 1: Create a Google Cloud account.
Click the project selector Select a project:
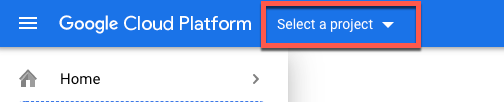
The project selector dialog box displays:
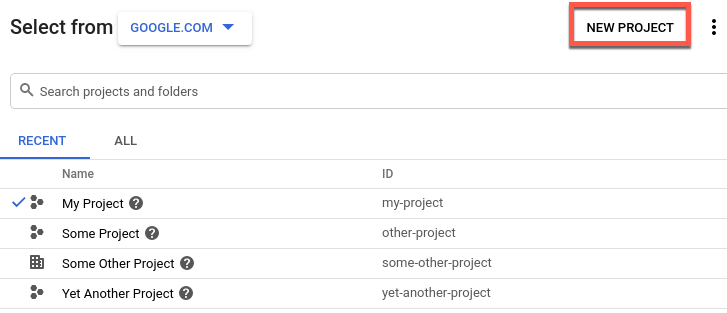
Click New Project.
The New Project view displays.
Enter a friendly name for your project in the Project name field. The project name can contain only letters, numbers, single quotes, hyphens, spaces, or exclamation points.
Google Cloud generates a corresponding project ID below the Project name field, as the following example shows.
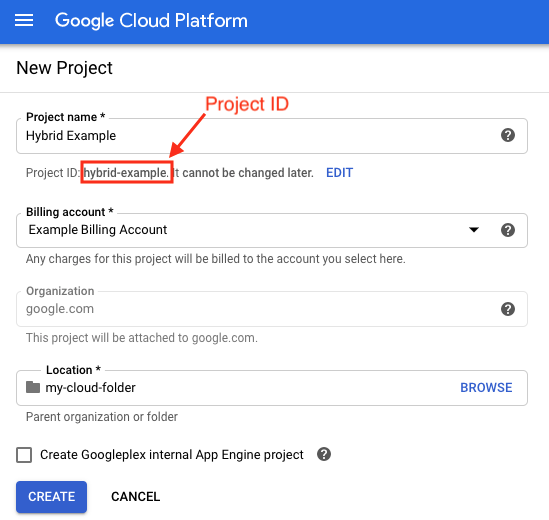
You can change the generated Project ID by clicking Edit, but the project ID must be unique. The project ID can have lowercase letters, digits, or hyphens, and must start with a lowercase letter.
Take note of the Project ID. You will use it later in this setup process.
 Note: After you create the project, you cannot change the project ID.
- In the Billing account field, select the Google Cloud billing account to use to pay for your project. If you do not yet have a Google Cloud billing account, see the following:
- To add a new billing account: Cloud Console billing page
- To learn about Google Cloud Billing accounts: Create, modify, or close your Cloud Billing account
- In the Location field, select a folder for your project. Folders are an optional part of the Google Cloud project resource tree.
Click Create.
This section describes how to add, change, and remove users with the UI.
API Admin and Environment Admin. Because these users were defined at the Cloud Project project level, they can access all environments with that level of access.By using the UI, though, you can set roles of existing users at the environment level.
To specify user permissions for an environment:
- Ensure that you have already added the user to your Google Cloud project. For information on adding users to a Google Cloud project, see Google’s KB Article on Granting, changing, and revoking access to resources.
- Open the GCP UI in a browser.
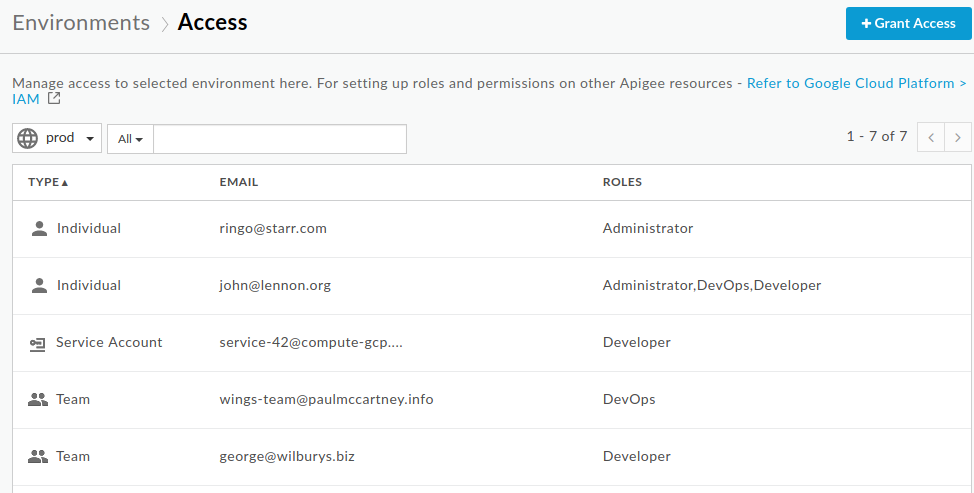
- Select Admin > Environments > Access in the left navigation menu.
- Select the environment name from the drop-down list.
The UI displays a list of current user accounts and roles for the selected environment:
- Click +Grant Access.
The Grant Access to Environment dialog box displays:
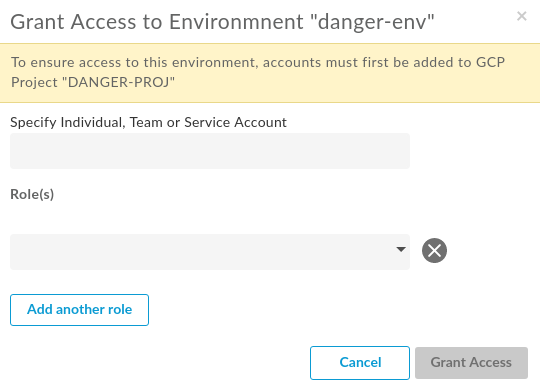
- Enter the user account’s email address in the first field. This email address is typically one of the following:
- A Google account (for example,
fred@gmail.com). All Gmail accounts are Google accounts, but you can also register email addresses with different domains as Google accounts. - A Google Group alias. For example,
address@googlegroups.com. - A service account. For example,
address@example.gserviceaccount.com. - A Google Workspace domain. For example,
address@example.com, whereexample.comis a domain that you used when you signed up for Google Cloud services.
- A Google account (for example,
- Select a role from the Role drop-down list and click Add. You can add more than one role for each user. For details on available roles, see Google’s KB on roles and IAM permissions reference.
- Repeat this process for each environment for which you want to specify the user’s role.
You can remove a user account from an environment using the UI, but that user account will still have the access that it was granted in the Google Cloud Console unless you also remove the user from the Console by default.
To revoke the user’s access entirely, you must remove them from the Google Cloud project as described in Revoking Access to Google Cloud Platform.
To remove a user from an environment:
- Open the GCP UI in a browser.
- Select Admin > Environments > Access in the left navigation menu.
- Select the environment name from the drop-down list.
The UI displays a list of current users for the selected environment.
- In the user’s row, click delete.
The UI displays a confirmation dialog box:
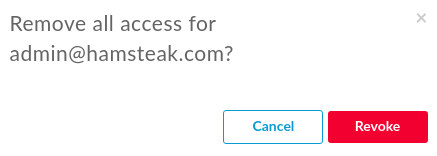
- Click Revoke.
The UI removes that user from the environment.
- Overview: Shows a summary of the other sections, including number of reviews, social posts, leads, and web sessions.
- Reviews: Shows the number of reviews collected, connected networks, and recent reviews.
- Social: Shows total social posts and engagement (likes, shares, comments, and interactions).
- Leads: Shows organic web traffic, paid traffic, and traffic from email marketing campaigns.
- Website: Shows unique visits, sessions, bounce rate, and average session time.
- Reputation: This section shows your reputation score and tracked competitors.
- Online Reputation: The percentage of increase in reviews.
- Social Engagement: The engagement growth from the previous week/month.
- Web Traffic: The percentage of new traffic to your website.
- Reviews: Number of reviews received for that period week/month.
- Social Posts: Number of post published to social media accounts.
- Leads: Leads submitted through the contact form.
- Web Sessions: Number of new web sessions.
- Reviews Score: Average score based on reviews you have received.
- Connected Networks Reviews: Average score based on feedback received through social media.
- Recent Reviews: Displays your two most recent reviews.
- Unique Visits
- Sessions
- Bounce Rate
- Average Time
- Total Posts: Displays the number of posts you’ve published in the past week or month.
- Total Posts by Social Media Account: Breaks down the number of posts published by social media account.
- Engagement: Will display the below metrics from social media:
- Likes
- Shares
- Comments
- Interactions
- Organic Web: Leads generated directly through the contact form on your website.
- Paid Ads: Leads generated from PPC or SEM.
- Email Marketing: Leads generated through email marketing.
- Unique Visits
- Sessions
- Bounce Rate
- Average Time
- Reputation Manager: Shows your reputation score and its growth.
- Competition Tracker: Shows your tracked competitors.
If you don’t have one of these social media accounts, select “Create Account” to get started on that platform.Conversations has two notifications:
New Conversations: Notifies you about any new incoming conversation.
Performance Report: Provides you with data on the frequency of conversations in a given time period (weekly or monthly).
- Push: Sent from your mobile app
- SMS: Sent to your phone
- Email: Sent to your email

What are cookies?
Cookies may be set by a website so it can remember things about your visits, like your log-in information or what you have in your shopping cart – making for a seamless experience on the site. Some websites may also use cookies to serve relevant ads to its visitors. If you’d like to prevent a website from setting cookies, we recommend disabling third-party cookies, which stops most websites from using information in this way. Please see “How do I disable cookies?”
How do I disable cookies?
Identify the browser and operating system you’re using and follow the instructions below to disable third-party cookies. If you’d like to prevent any cookies from being set, you’ll follow the same steps – just select the option to disable all cookies instead.
Windows
Internet Explorer
- Select the gear in the upper-right corner, then select “Internet Options.”
- Click the “Privacy” tab.
- Select the “Advanced” button.
- Under “Third-party Cookies,” choose Block to automatically block cookies or Prompt to prompt with each cookie request.
- Click “OK.”
Chrome
- Select the Chrome menu icon.
- Click “Settings.”
- Select “Show Advanced Settings.”
- In the “Privacy” section, select “Content settings.”
- Check “Block third-party cookies and site data.”
- Select Finished.
Firefox
- Click the menu button and choose Options/Preferences.
- Select the Privacy panel.
- Set Firefox will: to Use custom settings for history.
- Set Accept third party cookies: to Never.
- Close the about:preferences page.
Edge
- Click the “More actions” button in the top-right corner. Select “Settings.”
- Click “View Advanced Settings.”
- Click the dropdown arrow under the Cookies field.
- Select “Block Only Third Party Cookies.”
Mac OS X
Chrome
- Select the Chrome menu icon.
- Select “Settings.”
- Select “Show Advanced Settings.”
- In the “Privacy” section, select “Content settings.”
- Check “Block third-party cookies and site data.”
- Select “Finished.”
Safari
- Choose Safari > Preferences
- Click “Privacy”
- Set “Block cookies” to “From third parties and advertisers.”
Firefox
- Click the menu button and choose Options/Preferences.
- Select the Privacy panel.
- Set Firefox will: to Use custom settings for history.
- Set Accept third party cookies: to Never.
- Close the about:preferences page.
iOS
Safari
- Tap Settings.
- Select Safari.
- Select Block Cookies.
- Choose Allow from Current Websites Only from the list. In iOS 7 or earlier, choose From third parties and advertisers.
Android
Chrome
- Tap Menu > Settings > Site settings.
- Tap Cookies.
- Uncheck Allow third-party cookies.
What is GDPR?
GDPR (General Data Protection Regulation) is a set of rules designed to give EU citizens more control over their personal data. Under GDPR, organizations must ensure that personal data is gathered legally and under strict conditions. It also requires that those who collect and manage data protect it from misuse and respect the rights of data owners.
Who does GDPR apply to?
GDPR applies to any organization operating within the EU, as well as any organizations outside of the EU that offer goods or services to customers or businesses in the EU.
What does GDPR say about cookies?
GDPR requires that cookies be treated as personal data and requires users to have the choice: they must either consent to using cookies or opt out.
- Custom block elements
- Span settings
- Flex row settings
- Block features such as add, delete, and re-arrange blocks
- Type\module blocks
- Settings such as website settings and integrations
To make changes to an image on your website, select the Manage Your Site tile.
Hover over the image and select the Crop icon.
Use the image grid to crop or move the bar. Select “Save”.
- HomeAdvisor
- HomeStars
- Better Business Bureau
- Zillow
- Zomato
- Thumbtack
- WebMD
Once you have signed up for our reviews platform, connecting your social accounts is quick and easy.
- Google Reviews: Reviews on Google that help improve your local search ranking
- Yelp: Collects reviews of local businesses
- Instagram: Users can now publish and schedule posts on Instagram
- Facebook: Social platform where you can connect with customers and collect reviews
- Twitter: Social platform where you can interact with customers
- Foursquare: Local search-and-discovery app
- Trustpilot: Hosts reviews of businesses worldwide
- OpenTable: Users can make online reservations and read restaurant reviews
- TripAdvisor: Reserve hotels, book transportation and restaurants, and read traveler reviews
- Angie’s List: Online directory with reviews of local businesses and contractors
- Manta: Allows users to search for local businesses
- Consumer Affairs: Collects consumer reviews and resources
- Cylex: Online business directory with reviews
- Yellowpages: Local business directory with reviews
- RateMDs: Submit and read reviews of doctors, dentists, psychologists, urgent care centers, group practices, and hospitals
- Zocdoc: Medical care appointment booking service with reviews
- Houzz: Home improvement community where you can showcase your work and collect reviews
- Realtor: Real estate listings website
- The Knot: Wedding planning directory with lists of vendors and reviews
- WeddingWire: Connects consumers with website professional
Connecting Your Facebook Brand Page
Connecting your Facebook brand page allows our platform to:
- Receive your social posts
Log in to your Twitter account from the pop-up.
Log in to your LinkedIn account from the pop-up.
Select “Allow”.
Tumblr is now connected.
- Product Details Embed: Showcase detailed product reviews on your product pages.
- Star Ratings: showcase the average aggregated rating of a product.
How to install the “Product Details” embed for your website.
- Product Details Embed: Showcase detailed product reviews on your product pages.
- Star Ratings: showcase the average aggregated rating of a product.
How to install the “Product Details” embed for your website.
How to install the “Star Ratings” embed to my website.
You can send a review request via email or SMS, on either a product or a service, or both if it applies to your business.
Login to your Digital Ecosystem account, the select the “Get 5 Star Reviews” tile, click on the “Get Reviews” tab:
In the “send to” field, you can enter the the contact name, email, phone number or group name that you want to send the review request to.
The search is intuitive for faster results.
Select your recipient;
Then you can choose to send a product review, as service review, or both.
You can select the product or products you want to send our review requests for.
Next, you can edit the request message or choose to send it as is.
Click on the envelop icon to edit the subject line.
Other available Dynamic Tags:
You have the option to Send Now, or to Schedule your review request.
You can check your Scheduled and Sent review request, buy clicking on the “Scheduled Reviews” tab:
Click on the 3 dots to:
- Edit a Request
- Cancel a Request
- Send Now
- Preview Message
- Product reviews helps a company by providing a platform where all the previous buyers of their products, can give their feedback about the product they have purchased. A good review on a product helps the other buyer to purchase the product.
- It also helps the business to get the feedback on the service provided or the feedback on a product. With this information a business owner can improve there product(s) and or service(s).
Our Product Reviews application has three different ways to automate sending reviews request;
- Order Confirmation Email Integration: This automation is triggered when your ecommerce platform sends out an email confirmation on a purchase.
- Order Confirmation Integration: This automation is triggered when a purchase is confirmed by your ecommerce platform.
- Zapier (Zapier is a middle-ware application used to communicate between to platform): You can create a trigger and action that will automate the reviews collection process.
How to set up “Order Confirmation Email Integration” for your Shopify store:
How to set up “Order Confirmation Integration” for your Shopify store.
How to set up “Zapier Integration” for your Shopify store.
To change the sentiment of a post, select the Reputation Manager tile.
Each post has a sentiment of unhappy, neutral, or happy. Click to change the emoticon if you notice any discrepancies.
Unhappy:
Neutral:
Happy:
Select to filter by sentiment.
Facebook | Twitter | Yelp | Foursquare | Google Review |
Trip Advisor | Open Table | Houzz | Angies List | Trust Pilot |
Manta | Instagram | Cylex | Ratemds | The Knot |
Wedding Wire | Yellow Pages | Consumer Affairs | Realtor | Zocdoc |
To view your Happiness Meter, select the Reputation Manager tile.
Each post has a sentiment of unhappy, neutral, or happy. Click to change the emoticon if you notice any discrepancies.
The Happiness Meter gives you an overall look at how satisfied your customers are.
If you’re able to respond to a negative post and resolve the issue, change the sentiment to Happy to update your Happiness Meter percentage.
To update your feed, select the Reputation Manager tile.
Select Sync Feed to update your feed. Our system automatically updates your feed every 15 minutes.
Select “Share” to share a review to your social media accounts.
Select the platform you’d like to share to.
To respond to a post, select the Reputation Manager tile.
Select “Respond” to respond to a review.
Type your response, and then select “Post”.
- Average CPC
- Cost / Spend
- Cost / Conversion
- Conversion Name: This is the name given to your conversion.
- Select The Campaign: If you have multiple keyword campaigns running, here is where you select which one to track.
- How many conversions should we count: Select “One” if you are tracking a keyword campaign being used on a lead form or sign-up form. Select “Every” if you’re tracking items in an e-comm store.
- Customize the conversion value: This lets you track how much these conversions are worth to your business.
- Select the maximum time after an ad interaction that you want to count as conversion: To see how long it takes your customers to convert, segment your reports by days to conversion.
- Select the max time after a person views your ad that you want to count view-through conversions: A person may see your ad and not interact with it, then convert later. This is called a view-through conversion.
- Select an attribution model for your Search Network and Shopping conversions: We recommend “Time Decay”, which gives more credit to ad interactions that happened closer to the conversion.
Using the same logic as sitelink extensions, structured snippet extensions enable you to list the specific products, services, or (in the case of a travel agency, for instance) destinations you offer. Rather than hyperlinks, they’re shown below your ad description in a list format preceded by a header.
At no additional cost to you, sitelink extensions allow you to entice search prospects with deep links that lead to specific pages across your website.
Ad extensions are optional and not mandatory for your ads.
Confirm your business information and select “Submit”.
This will direct you to your Google Ads dashboard. From here, select Tools & Settings > Billing Settings
Add your billing and credit card information. Google will charge this card for your campaigns.
Creating Your Campaign
Tip: If you’re a brick and mortar store, think about how far customers would travel to get to you. If you are a mobile service, like a plumber or landscaper, select “Set up specific areas” and target the cities you service.
Select the languages you want your ads to display in.
Select the network(s) you want your ads to appear on.
Select suggested keywords or search for your own keywords.
Tip: Keep your budget in mind here. You want to make sure you’re paying for keywords that match your business and your products/services.
Tip: The “Suggested Bid/Click” column estimates how much it will cost when a customer clicks your ad. Try selecting keywords that have a large reach with a low suggested bid per click. You can also try keyword synonyms that might have a lower bid per click.
You’ll also see your total estimated reach.
Complete all the fields on this screen. You’ll see a preview of your ad to the right.
Tip: When writing your ad, keep your customer’s goal in mind. What solution are you giving them? How are you going to do this better than your competitors? Explain this in as few words as possible. Your ad should be attention grabbing and direct.
If you want to learn more about a specific field, hover over the question mark icon.
Select “Done” to save your ad.
From here, you can write another ad, edit the existing add, or duplicate the existing ad.
Select “Next” to continue to the budget screen.
Set max cost per click and your max daily budget. Use the slide bar to adjust the
amount.
Select “Finish & Review”.
Here you can review and edit all the info you’ve provided.
Select a start date for the ad. You can also select an optional end date.
Your campaign has now been submitted to Google for review!
Select the plus icon.
Select the Website tile.
Complete the following fields according to what you want to track from your campaign.
Tip: After a visitor lands on your site, you should track the action you want them to take. If you have an online store, you want to track purchases. If you are trying to capture leads, select Submit Lead Form. If you want people to just view the content on your page, select Page View.
Enter a conversion name and select a value.
Tip: Leave the dollar amount blank unless you are selling online. If you are selling online, add the dollar value of the item you’re selling. If you’re selling different items at different prices, you can set a “default” price. This will be used instead of the individual values.
Select a count.
Select a time frame for your conversion window.
Select a time frame for your view-through-conversion window.
Leave the last two fields as is.
Select Create and Continue. On the next page, select “Install the tag yourself”.
Select the first option, and then select “Download Snippet”.
Select Menu > Website Settings > Custom Code
You can now track the activity from your Google Ads traffic!
Tip: Schedule your campaign during the days and times that you’re available to respond quickly to inquiries, like during your business hours.
If you need to make edits to your campaign, select “Edit campaign”. Select a pencil icon to make changes.
Tip: We recommend the Call extension and Location extension. A call extension lets visitors call you directly from the ad and a location extension displays your address.
Call Extension Example:
A location extension needs to be connected to your Google My Business account. This is how businesses appear in Google Maps and the local pack through paid search.
Example of Location Extension:
Google Local Pack:
Select the Notifications tab to manage email notifications about ad performance, completion, pause, and start.
To view your campaign’s performance, select the Ads Management tile.
Select “View Performance Details”.
Tip: Track your clicks, impressions, conversions, and cost. This gives you a good idea of how much you have to spend in order to get the results you want. It will also show you how many impressions it takes to get clicks and conversions.
Tip: Remove keywords that are not getting many impressions and replace them with alternatives. You can always pause and activate keywords.
Below are some tips for how to improve the performance of your Google Ads:
- To encourage clicks, provide a clear call to action in your ads.
- Include promos or pricing in your ads. This lets people know what you’re offering up front, similar to seeing a promo posted in a store’s window. What would you need to see to get you through the front door?
- Make sure your keywords are relevant to your product/service. Be as specific as possible to funnel your campaign to the right audience. If you offer home renovation services, a keyword like “home” is too generic. Make sure “renovation” is included to narrow down your audience.
- Google uses algorithms to match your keywords to what users are searching. For example, someone might search “looking to rent a house”. If you are using “homes” as a keyword, Google may associate the word “house” to “homes” and your campaign may pop up, even though it’s not relevant. Using Search Terms in your Google Ads dashboard allows you to monitor what Google is matching with your keywords. Use Negative Keywords to omit keywords/phrases so your ad doesn’t show up in those searches. This can help you save money and target a better audience.
- Make sure your landing page is built to convert by including the following:
- A Clear Call to Action: You want to encourage your visitors to take action, so direct messaging on your landing page is key.
- Coupon/Promo: Offering visitors a discount or special is a great way to encourage them to choose you.
- High-Quality Images & Videos: Quality content speaks volumes. Grab attention with high-quality images/photos that show off what you do.
- Reviews: A collection of glowing reviews helps give your visitor the assurance they need to seal the deal.
- A Catchy Headline: Grab your visitor’s attention with something that’s meaningful, powerful, and gives a clear sense of direction
To view your campaign’s performance, select the Ads Management tile.
Select “View Performance Details”
Tip: Track your clicks, impressions, conversions, and cost. This gives you a good idea of how much you have to spend in order to get the results you want. It will also show you how many impressions it takes to get clicks and conversions.
Tip: Remove keywords that are not getting many impressions and replace them with alternatives. You can always pause and activate keywords.
To track the success of your Google Ads campaign, we recommend creating an SEM landing page. This makes it easy to track traffic from your campaign separately from organic traffic to your website.
Below are two ways you can track conversions.
Global Site Tag: The global site tag adds visitors to your basic remarketing lists and sets new cookies on your domain, which will store information about the ad click that brought a user to your website. You must install this tag on every page of your website.
You can add this to your Header or Footer Code in A.I. Editor > Website Settings > Custom Code
Event Snippet: The event snippet works with the global site tag to track actions that should be counted as conversions. Choose whether to track conversions on a page load or click (we recommend page load).
Add this code to the final page clients land after they have called you or completed your contact form. This ensures that the only way your client will see this page is if they have contacted you.
We recommend a “Thank You” page. On this page, you can place the embed code in A.I. Editor > Manage Blocks > Add Block > Embed
Impressions tell you how often your ad is shown. An impression is counted each time your ad is shown on a search result page or other site on the Google Network.
When someone clicks on your ad and then takes the action you’re encouraging them to complete, like calling you or filling out your contact form.
A ratio showing how often people who see your ad end up clicking it. Clickthrough rate (CTR) can be used to gauge how well your keywords and ads are performing.
Confirm your business information and select “Submit”.
This will direct you to your Google Ads dashboard. From here, select Tools & Settings > Billing Settings
To start creating your Google Ads campaign, log in to your dashboard and select the Ads Management tile.
Tip: If you’re a brick and mortar store, think about how far customers would travel to get to you. If you are a mobile service, like a plumber or landscaper, select “Set up specific areas” and target the cities you service.
Select the network(s) you want your ads to appear on.
Select “Next”.
Select suggested keywords or search for your own keywords.
Tip: Keep your budget in mind here. You want to make sure you’re paying for keywords that match your business and your products/services.
Tip: The “Suggested Bid/Click” column estimates how much it will cost when a customer clicks your ad. Try selecting keywords that have a large reach with a low suggested bid per click. You can also try keyword synonyms that might have a lower bid per click.
Complete all the fields on this screen. You’ll see a preview of your ad to the right.
Tip: When writing your ad, keep your customer’s goal in mind. What solution are you giving them? How are you going to do this better than your competitors? Explain this in as few words as possible. Your ad should be attention grabbing and direct.
If you want to learn more about a specific field, hover over the question mark icon.
Select “Next” to continue to the budget screen.
Select “Finish & Review”.
Here you can review and edit all the info you’ve provided.
Your campaign has now been submitted to Google for review!
Select the Notifications tab to manage email notifications regarding ad performance, completion, pause, and start.
To filter your Competition Tracker feed, select the Competition Tracker tile.
Select the checkbox to make the social platform visible in your feed.
Deselect a platform to remove it from your feed.
To update your Competition Tracker feed, select the Competition Tracker tile.
Select Sync Feeds to update your feed. We automatically update your feed every 15 minutes.
To view your Competition Tracker feed, select the Competition Tracker tile.
You can filter your feed by Competitor, Emotion, Post Type, and Date Range.
Competitor Filter
Emotion Filter
Post Type Filter
Date Range
To view your competition’s stats, select the Competition Tracker tile.
Scroll down to the Your Competitors section. Here you can see where your competitors’ customers are talking about them.
To set up Competition Tracker, select the Competition Tracker tile.
Select “Get Started”.
Allow location tracking so we can recommend competitors in your area.
Search for your competitors by business name or industry.
When you find a competitor you want to track, toggle the tracking button to On.
Below you’ll see recommended competitors based on your location.
Select “Save”.
To view posts, select the Competition Tracker tile.
You can view posts about your competition in your feed.
Select View Comments to view additional comments on the post.
To change the sentiment of a post, select the Competition Tracker tile.
Select the emoticon that matches the sentiment of the post: Unhappy, Neutral, or Happy.
Select the Categories tab and then select “Create New Category”. Enter a Category Name and select a cover image.
- Select the Social Calendar tile.
- Select the edit link on the post you would like to edit.
- Update the post title, description, or image.
- Select the Schedule button to save updates.

To preview your posts in Social 365, follow the steps outlined in this article:
- Log in to your dashboard and select the Social Calendar tile.
- To preview a post and see what it will look like before you publish it, select a post on your calendar or create a new post. Then select the preview icon at the top of the pop-up.
- Select a platform to see how your post will look on that platform. You can preview your post on any of the following platforms that you’ve connected: Facebook, Twitter, LinkedIn, Tumblr, and your blog.
You can preview your posts on the following platforms: Facebook, LinkedIn, Twitter, Tumblr, and your blog.
To exit out of the post preview, select “x” in the upper right hand corner.
- Select the Social Calendar tile.
- Select the edit link on the post you would like to edit.
- Update the title, description, or image.
- Select the Schedule button to save updates.
To add a post, select the “+” icon.
Select “Create New Post” or choose a post from our content library.
To browse our library of content, choose a category.
When you choose a post, drag and drop it onto the day you want to publish it.
Select “Create New Post” to create a new custom post.
Add a title, caption, and image, and select a publishing date and time.
Select the days of the week icons to enable or disable posting on specific days.
Select the Social Analytics tab.
Once you start posting, we’ll track the following actions on your posts:
Action Metrics:
- Reactions
- Comments
- Shares
Select the Social Analytics tab.
Once you’ve started posting, we’ll track the following post types:
Post Format:
- Plain Text
- RSS Feed
- Image-rich
Select the Social Analytics tab.
Once you start posting, we’ll track the following:
Action Metrics:
- Reactions
- Comments
- Shares
Post Format:
- Plain Text
- RSS Feed
- Image-rich
Top Posts by Engagement
Select the Social Analytics tab.
Scroll down to view the Top Posts by Engagement section.
Our Local SEO tool automatically adds you to 40+ directories with just a few clicks.
Select “Get Started”.
Business Name
Business Type
Business Sub-type
Business Address
Contact Information
About Your Business (Short Description)
About Your Business (Long Description)
Business Hours
To update your Basic Info section, select the Local SEO Listings tile.
Business Name
Business Type
Business Sub-type
Business Address
Contact Information
Business Website
About Your Business (Short Description)
Business Hours
Business Hour Notes
To update your About Your Business section, select the Local SEO Listings tile.
Keywords: Add up to 10 keywords relevant to your business, adding the most important ones first.
Attributes: Select attributes that help describe your business to customers.
To update the media included in your local listings, select the Local SEO Listings tile.
Square Logo
Add videos in the Videos section. Add a link from YouTube or Vimeo and select “Add”.
You can add multiple videos.
Once all fields are complete, navigate to the Local SEO Listings tab and select “Create Listings Now”.
Google and Facebook require you to log in to your account using your username and password. Select “Connect”.
Select “Start” from the pop-up window.
Enter the email address associated with your Google My Business account.
Enter your password and select “Next”.
Select “Allow”.
Maps:
Google Maps
Bing Maps
Navmii
HERE
Social:
Google My Business
Foursquare
Yelp
Voice:
Google Assistant
Amazon Alexa
Apple Siri
Microsoft Cortana
Directories:
Chamber of Commerce
EZlocal
Judy’s Book
LocalStack
USCity
My Local Services
Where To
iGlobal
CitySquares
Acompio
n49
us.info
Tupalo
ShowMeLocal
Cylex
Hotfrog
Brownbook
Manta
Yalwa
Waze
Uber
Aggregators:
Factual
Car OEMs:
GM
BMW
Audio
Mercedes
VW
Ford
Fiat
Toyota
To add photos or your logo to your local listings, select the Local SEO Listings tile.
Square Logo
To add video to your local listings, select the Local SEO Listings tile
You can add multiple videos.
- Growth Report
- Social Accounts
- Social Calendar
- Get 5 Star Reviews
- Local SEO Listings
- Ads Management
- Email Marketing
- Select the Your Customers tile.
- Select Add Customer.
- Enter the customer’s information: First & last name, email address, phone number, and customer group (optional).
- Select Save New Customer, you will be directed to the Customer Overview section.
To import customers, select the Your Customers tile.
Select the import icon.
Select the link to download a .CSV template.
Add customer information to the appropriate cells in the template.
Remember to save as a .CSV file.
Once the file is ready, select “Choose File” and select the .CSV file.
The file will upload and you will see a preview of the customer list.
Select the drop-down menu next to each column to match the columns to the correct column title.
Select “Import Customers”.
The import is now complete. Select “Continue”.
The customers are now added to the Customer Overview section.
To send a survey from the Your Customers section, select the Your Customers tile.
To send the customer a survey, select the Send Survey icon.
Select “Yes” from the pop-up menu to confirm.
To create a customer group, select the Your Customers tile.
To manage customer groups, select the Groups tab.
By default, all customers are added to the General group.
Select the “+” icon to add a new customer group.
Enter a group name and select the checkbox next to each customer you’d like to add to the group.
Select “Add” to add the customers to the group. Select “Save”.
The new customer group has now been created.
To search for a customer group, select the Your Customers tile.
To manage customer groups, select the Groups tab.
Use the search field to enter the customer group name. The results will display below.
- Contact Information
- Business Information
- Website Information
- About Your Business (Short Description)
- About Your Business (Longer Description)
- Business Hours
- Business Hour Notes
- Special Hours
- Timezone
To create a blog post:
- Select the Blog Platform tile.
- Select Write A Post.
- Enter the blog headline and description.
- Add your post to a category (optional).
- Enter the keywords for the blog post.
- Select Publish to post to your blog.
Select “Image” to add an image to your post.
Add an image from your computer or enter a URL where the image is hosted.
You can add a caption once the image is uploaded.
Type the caption and select “Done”.
To adjust the image’s dimensions, highlight the image, right click, and select “Image”.
Here you can add alt text for ADA compliance, adjust the image dimensions (select the checkbox to constrain the proportions), or select to have the image load to full screen width.
Select “Image” to add an image to your blog post.
Add an image from your computer or enter a URL where the image is hosted.
To adjust the image’s dimensions, highlight the image, right click, and select “Image”.
Here you can add alt text for ADA compliance, adjust the image dimensions (select the checkbox to constrain the proportions), or select to have the image load to full screen width.
Note: If you don’t already have a Google Analytics account, visit https://support.google.com/analytics/answer/1008015?hl=en to learn how to get started.
To connect your Google Analytics account, select the Site Analytics tile.
There are two tabs: Overview and Settings. To set up analytics, select “Click here to configure analytics”.
Select “Connect” in the Google Analytics section.
Enter the Google account information used to set up Google Analytics. Select “Next”.
Select “Allow” to grant access.
Click the drop-down menu and select the domain.
Select “Save”.
Select the Overview tab to view analytics.
Select the Settings tab to remove or edit the connected Google Analytics account.
Learn how to set up your website’s analytics. We’ll track the metrics that matter most so you know exactly how visitors are interacting with your website.
To update your profile image, hover over the profile icon.
Select the “My Profile” link.
- SEO grows your audience. When you have a high Google ranking, your online reach increases and so does traffic to your site.
- More traffic means more opportunities to convert visitors into customers.
- SEO is good for visibility and branding. If you continually appear in search results, that means you are making impressions on potential customers.
- SEO helps build your brand’s credibility.
- We trust search engines to give us exactly what we need. We take their rankings as a vote of confidence.
- The higher your website ranks, the more search engines trust your website, and the more people will trust you too.
- SEO can boost the effectiveness of your other online marketing efforts.
- Because of increased visibility in search engine results with SEO, you can boost the effectiveness of your other marketing efforts, like social media marketing, content marketing, ad campaigns, etc.
- SEO can improve offline conversions. If you’re using a good local SEO strategy, you’ll have consistent listings and business information across the Internet that include your business name, hours of operation, address, and phone number — the info that makes it easy for a searcher to visit your location and become a customer.
Both are important. You can’t establish domain authority, organic brand affinity, and really, a wholly formed online presence without SEO. But you can’t granularly target prospects by demographic, behaviors, or keywords without PPC.
On-page SEO refers to tactics utilized on or within a page to assist it in ranking higher in search engine results. On-page SEO includes both content and the HTML source code of a page (image optimization, keyword optimization, Schema markup, and more), but not external links and other external signals.
Yes! If you’re not familiar with HTTPS, it is essentially a more secure form of HTTP. Look up at the URL of this page. See the “https” at the beginning, and the word “Secure” to the left of it? Google looks on pages like these favorably. Not only does it index HTTPS pages first, but it also recognizes HTTPS as a ranking signal. HTTPS is also faster than HTTP, which can affect click-through rate. So yes, changing to HTTPS should positively impact your rankings.
Meta Keywords Attribute is antiquated, and you shouldn’t worry about it. Your Meta Robots Attribute is most likely already set to “index/follow”. What you should worry about is your title tag and meta description.
Robots.txt is a text file within your website’s top-level directory that instructs search engines how to crawl your pages.
The internet is made up of two things: content, and links between content. When search engines first started indexing web pages, they needed a way to determine which pages were most relevant to certain queries (a system of ranking). The quality and number of backlinks pointing to a page immediately became a factor in determining that page’s rank. Backlinks represent a vote of confidence from one site to another. The more quality backlinks your page earns, the more valuable it is in the eyes of the search engine, and the more likely it is to achieve a high ranking.
- Registration date
- Name servers
- DNS records
- Domain expiration date
- Registrar organization
- Domain owner contact information
There are a few reasons why your domain may not be available:
- The domain you entered could already be taken.
- It could be a premium domain.
- It might contain too many characters.
We’re happy to transfer your domain for you! Here’s what we’ll need:
- We use GoDaddy to purchase all domains. If you don’t already have a GoDaddy account, please go to www.godaddy.com and sign up. It’s free to join.
- Send us your Customer Number and the email address you used to sign up. We won’t need your password to make the transfer.
- Once the transfer is complete, you’ll receive a confirmation email from GoDaddy.
Please send us your GoDaddy account details. Just let us know you’d like to transfer your domain.
If you use another domain registrar, contact us. We can unlock the domain and send you the EPP\Transfer Code. You will need to initialize the transfer from that registrar. Since all domain providers do this differently, contact your domain provider for instructions.
@ | A Record | 54.212.155.189 |
@ | A Record | 54.185.12.82 |
www | CNAME | DomainName.com |
All your purchased domains can be viewed by selecting the Domain Manager tile in your dashboard.
Yes, you can control your DNS settings through your dashboard.
- A-Records
- AAAA Records
- CNAME
- TXT (Text)
- SRV
- NS (Name Servers)
A domain name is the address of your website. It is the name that people type into the URL bar of their browser to find your website. Domain names can be purchased through a domain registrar or through your hosting provider.
- An A record for example.com pointing to the server IP address
- A CNAME record for www.example.com pointing to example.com
Select the SEO tile to view your website’s SEO details.
Here you can add SEO titles, descriptions, and keywords to your pages. You can also make a page visible or hidden to search engines, and view your SEO completeness score.
To view your SEO score, select the SEO tile.
How do I make my website’s pages visible/hidden to search engines?
View your score at the top right of your screen. This shows the completeness of all your website’s SEO details, like SEO titles, descriptions, keywords, etc.
To make a page visible/hidden to search engines, select the SEO tile.
Toggle the Search Visibility button to “On” to make a page visible to search engines. To hide a page, toggle the button to “Off”.
- Testing subject lines
- Testing CTA buttons
- Testing sender names
- Our powerful analytics tool shows real data in intuitive graphs, telling the story of which version resonated best with your customers.
- You can then choose to send the winning version to the remaining recipients on that contact list, or have us do it for you automatically.
- With A/B testing, you benefit from very efficient email testing and together with other features (segmentation, campaign comparison, etc.), you will know how to design the most effective email.
- Design your campaign
- Create one or more variations of that campaign
- Define the test criteria and recipient size
- Review the results
The “Create a new campaign” page shows the different sections of your campaign that need to be completed.
- Campaign Name: This is an internal name for your campaign that only you see.
- Language: Set the language of your campaign.
- Subject: The subject of your campaign as it appears in your recipient’s inbox.
- From: Enter the name your recipients will see in the “from” field and the sending address.
- Contact List: Select your contact list. Create or apply a segmentation.
Customize your campaign by adding new elements with a quick drag-and-drop. Click in any section to edit it.
Once you’re done designing, you’ve created your campaign, also known as Version A.
To create a new version, select the drop-down list, and select ‘”Create a new version”.
To delete a version, simply select the drop-down list and select “Delete this version”.
Now that you’ve created your campaign versions, the next step is to set the test sample size and the criteria for selecting and sending the winning version.
Click on the pencil icon to edit the configuration.
Enter the percentage of contacts that will receive your campaign versions. The total percentage or number of contacts will be divided by the number of versions you have.
You can now select how the winning version will be sent: automatically or manually.
Note: You must let the test run a minimum of 1 hour before reviewing any results, and the winning version needs to be sent within 7 days of the initial sending. (If after 7 days the winning version is not sent, you will receive notification that your campaign has been cancelled.)You can choose when to send your test sample by selecting “Schedule”.
Note: The A/B test needs to run a minimum of 1 hour before the winning version can be determined. If your test sample is large, you may wish to run the A/B test for a longer period before the winner is selected.Select “Send now” to send your A/B campaign.
Regardless whether your campaign is ongoing or completed, you can view it just like a regular campaign:
From your Campaigns page, select the A/B test tab, and then select your campaign title.
- Change from Automatic to Manual mode, and then you can decide the winning version.
- Adjust the winning version criteria.
- Change the date or time when the winning version will be sent.
- Cancel the A/B test.
- Change from Manual to Automatic mode. You will need to select the winning criteria and the date & time when the winning version will be sent.
- Change the date or time of your reminder email.
- Cancel the A/B test completely.
Once the A/B test has been completed, you will be able to view powerful data to see what your customers liked about your different versions.
The graph displays the selected metric, and the chart shows the statuses for each version.
- Change the display unit, time range, and chart type.
- Select the desired metric to be displayed in the graph. If you hover over the graph, a pop-up will show the KPIs for each campaign.
- Toggle the campaign display on the graph by clicking on the name.
- Compare various campaigns and benchmarks.
You are now ready to test and optimize your campaigns!
- email – This is for the Email field to be submitted to a contact group.
- firstName – This is for the First Name to be submitted to a contact group.
- lastName – This is for the Last Name to be submitted to a contact group.
- listName – This is the custom list name or contact group; if it does not exist, it will automatically create it.
You can create a workflow that allows you to create triggers and rules to send your emails.
Email automation allows you to set up a series of automated emails (called a workflow) to be sent to your contacts when certain criteria is met.
A workflow can be triggered by an event or action and is based on one of these scenarios:
- Welcome / Onboarding
- Date Based Workflow
- Contact Property Update
- Anniversary / Birthday
To create a workflow, you simply select a scenario, create one or more emails, and define the sending criteria. Our Email Marketing tool will then automatically send the emails to your customers who triggered the workflow.
Log in to your dashboard and select the “My Email Campaigns” tile.
Or if you are already logged in to your dashboard, select the Email Campaigns icon along the top navigation.
Select the “Automation” tab, and then select “My Workflows” and “Create workflow” to get started.
Next, you will be prompted to select an automation scenario.
Creating a workflow can feel overwhelming at first since there are many decisions to make. To help jumpstart your workflow, we’ve created a number of scenarios with predefined events. This article will walk you through creating the most common workflow (an Automated Welcome Email), but other scenarios are configured similarly.
- Welcome / Onboarding
Reach out and welcome new customers who join your contact list with one or more personalized emails.
Select the “Welcome” tile.
Fill out the “Basic Information”, and then select “Save and Continue”.
Next, start building your workflow email. Select the “Add an Email” button.
Confirm the parameters for this workflow.
Select from one of your own templates or you can use one from our gallery.
Edit your workflow, and then select “Save & Add to workflow”.
You have the option to add another email to your workflow. If you’re ready to move on, select “Save and Continue”.
You can now review and activate your workflow. You can also save this workflow and activate it later.
Your new workflow will appear in your list of workflows.
Yes! You have the option of adding and validating an entire domain. This option is only recommended if you have many sender addresses to add from one domain and you want to save time by not manually validating each one.
Log in to your Digital Ecosystem and select the “My Email Marketing Campaigns” tile.
Go to the settings tab, and then click on “Change Sender Address”, from the pop up click on “+Add a New Domain”.
Type in the domain you want to use, hit enter. Then you will be prompted to add some records in to your domains’ DNS settings.
Once you have entered the setting correctly, hit the Refresh button, and the status for the records should turn green. Then click Done.
Your new domain name will appear as an option when creating a new sender email address.
You can add multiple sender email addresses (or “From” email addresses). To view and add a sender email address:
- Sender Name: Display name that will appear in the email header.
- Email: This is the email address or alias you want, such as info, no-reply, or hello.
- Domain Name: This is the domain that appears after the “@” symbol.
To create an email campaign, log in to your dashboard and select the “My Email Campaigns” tile.
If you are already logged in to your dashboard, select the Email Campaigns icon along the top navigation.
- Sender Address:
Your login address is your default sender, but you can set up additional addresses and even validate a domain. Remember, you can only use addresses you own or manage. - Contact List:
By default, you have one existing contact list (“MyFirstTest”) which contains your email address. You can create an unlimited number of contact lists with our Email Marketing tool. You can even personalize your campaigns by adding contact properties (name, age, etc.) to your contact lists.
Select the “Campaigns” tab. Select “My Campaigns”, and then select “New campaign”.
The “Create a new campaign” page shows the different sections of your campaign that need to be completed:
- Campaign Name: This is an internal name for your campaign that only you see
- Language: Set the language for your campaign
- Subject: The subject of your campaign as it appears in your recipient’s inbox
- From: Enter the name your recipients will see in the ‘from’ field and the sending address
- Content: Design your content with our responsive email editor
- Contact List: Select your contact list
Once basic information is added, such as “Subject” and “From”, you can start designing the body of your email.
Now the fun part: designing your campaign with our email editor. Simply drag and drop content blocks into your campaign, and then select a section to customize it.
You can preview your campaign on different devices and send a test campaign to view how it will look.
Once you have completed your campaign design, select “Review & Send”.
On the “Create a new campaign” page, you can review your sections and make any necessary changes.
Select your contact list.
Once all sections are completed, you can schedule your campaign up to 60 days in advance or send it immediately.
Congratulations on creating and sending your first campaign!
You can view your scheduled campaigns along with some stats by selecting the “Scheduled” or “Sent” tab.
- Select the gear icon at the top right of your screen.
- Choose Settings.
- Select Users from the menu to the left.
- Select the pencil icon next to the user you want to connect.
- From the pop up, choose the Calendar tab.
- Click to connect to your preferred calendar.
- You will be asked to authenticate your account.
- Once you are connected, you can choose which calendars to 1-way sync, which to 2-way sync, and which to ignore.
See this video for a quick demo:
- Select the gear icon.
- Select Settings.
- Choose Users from the menu to the left.
- Select the pencil icon next to the user’s name.
- Select Availability.
- Set the hours/availability for that user.
- Repeat for other users.
- The business hours will now show the combined hours (earliest start time and latest end time) for all users in your account.
- Go to your calendar page.
- Click anywhere on the calendar (preferably on the day/time you want to block).
- A pop-up will appear (same one as when you are booking an appointment).
- From the drop down at the top left, choose “Block Schedule”.
- If you want to block the whole day, select the all day toggle.
- You can make this recurring by selecting the recurring option, and then choosing your settings.
- Select the gear icon at the top right of your screen, select Settings, and then select User settings.
- Select the pencil icon to edit that user.
- Select the calendar tab.
- Select “Connect” to sync with the calendar of your choice.
- Select settings (while still in the calendar tab).
- Choose which calendars in your personal calendar you want to connect.
- Ideally, you will 2-way sync with one calendar (appointments come to and from that calendar) and then 1-way sync with other calendars that you want to block times in your calendar.
- Select “Save”.
- Select the gear icon at the top right of your screen, and then select Settings.
- Select User settings, and then select the pencil icon to edit that user.
- Select Availability.
- Confirm available hours.
- Select the gear icon at the top right of your screen, and then select “Settings”.
- Select “Appointment Types” from the menu to the left.
- Select the pencil icon to the right of the appointment type you want to edit.
- Select “Appointment Start Time” from the top of the pop up.
- Choose your first start time (example, 9am), and then choose the days you want that 9am slot to be available.
- If you want to create another start time, you can select “Add an Appointment Start time”.
- If a customer chooses this appointment time, they will only be able to pick those available times. If you have other appointments on your schedule at these times, these “manual start times” will not appear.
- Select the gear icon at the top right of your screen.
- Select Users to the left.
- Select Add user.
- Once you create a user, that user will receive an email with login instructions and will be able to sync to their personal calendar.
- Admin – The admin is the primary user on the account. The admin has full access to all account settings, user settings, and schedules for all users.
- Team Leader/Manager – This role has permission to see their own “user settings” along with the “user settings” for every user assigned to them. The Team Leader also has access to view/edit their own appointments/calendar as well as the appointments/calendars of the users who are assigned to them.
- Users – Users have access to their own user settings and calendar. They can change their availability and sync to their own personal calendar, but will not have access to view a Team Leader or Admin calendar.
- Select the gear icon at the top right of your screen.
- Select 2+ user appointments from the menu to the left.
- Select “+ New Team Appointment Type”.
- Add the Name of the appointment and add a description (both included in email confirmations, etc.).
- Add a duration and buffer time.
- Choose which users will be in the meeting.
- Click to add an appointment now or later.
- If you choose later, you can click to “Invite”. An email will pop up that you can use to send the customer.
- Alternatively, you can copy the link and paste it in your own email, website, etc.
- Once the customer receives and selects the link, they will see a calendar that displays the combined availability for all users assigned.
- Select the gear icon at the top right of your screen, and then select settings.
- Select the top middle tab: “Booking Page Settings”.
- Scroll down to the list of questions.
- You can hide any field by selecting it. It will be greyed out and not appear to your customers.
- You can delete a field by selecting the trash icon.
- To add a new question, select “Add New Question”.
- Choose if it is required or not, and then select Update Info.
- At the top right of your screen, select settings.
- Select Appointment types from the menu to the left.
- Select the pencil to edit on the right side of the appointment type.
- A modal will appear. Scroll down and select “Add Custom Field”.
- Add the fields you would like, and then select “Update Appointment Types”.
- These questions will now appear only on that specific appointment type.
- Select the gear icon in the top right corner of your screen, and then select Settings.
- Select Integrations from the menu to the left.
- From the top tabs, select Iframe.
- Copy this code and paste it as an HTML element on your website.
- Select the icon at the top right of your screen, and then select Settings.
- On the menu to the left, select Integrations.
- The first page that opens is labeled “Website”.
- On this page, you can scroll down and build your own button.
- Choose a button background color.
- Choose a text color.
- Choose a border color.
- Choose the text you want to appear on the button (ex: Book an Appointment).
- Choose a border radius and font size.
- If you want the button to book only one staff member, choose the staff from the drop-down menu.
- If you want the button to only book one appointment type, choose the appointment type in the background.
- Choose a language.
- Scroll down and you will see the HTML code.
- Copy the HTML code to your clipboard.
- Open the project you want to add the booking button to.
- Go to the page where you want to add the button and click to edit that page.
- Add a HTML element to the page, or edit from the text editor.
- Once you place the HTML element where you want the button to appear, open the HTML element and paste the code from step 14.
- Once it’s pasted, your website will now have a button that will show a pop-up with the scheduling widget once clicked.
- You can install these buttons several places on one page (call to action on main page), and/or use different buttons with different calls to actions on different pages on your site. You may want to add a contact button for individual staff on their bio page, or a support call button on the support page. Add as many buttons as you want.
- If you support different languages, you can include different buttons in different languages throughout your site.
- Your business has a published Facebook page, and your Facebook account carries an admin role on it. Learn how to create a page in Facebook’s Help Center.
- Your products comply with Facebook Commerce policies and Guidelines for listing products.
- Your store’s default currency is supported by Facebook. You can change your store’s currency anytime from your store admin in Settings → General → Regional Settings → Currency.
- Products require shipping (so it can’t be a digital product) and can’t be free.
After confirming these steps, connect your store to Facebook.
- From your store admin account, go to “Ominchannel“, then “Sell on Facebook“.
- You will need to provide the account credentials and login via the next screen.
- Select the Facebook business page where you wish to sell your products and click Save.
- Accept Facebook Merchant Commerce Terms.
- In the app, go to Store and click Facebook Shop under Sales Channels.
- Click Connect Facebook page.
- Select the Facebook business page where you wish to sell your products and click Save.
- Accept Facebook Merchant Commerce Terms.
- In the app, go to Store and click Facebook Shop under Sales Channels.
- Click Connect Facebook page.
- Select the Facebook business page where you wish to sell your products and click Save.
- Accept Facebook Merchant Commerce Terms.
Your store will then sync all enabled products to a new Facebook Shop Tab. Once products are uploaded, you need to wait for Facebook to review your store before you can start selling and advertising. Check out the review status under the Pending review tab. Although you might see your products appear on the Shop section before Facebook has verified your information, customers will not be able to see your products until the setup process is complete.
- Products marked as “enabled” in your store will automatically show up in your Facebook Shop page.
- Products marked as “enabled” that are assigned to a disabled category will not be sent to your Facebook Shop.
- Products marked as “disabled” will not be sent to Facebook.
- Products marked as “enabled” that are featured on the Store Front page will be uploaded to the Featured products section on Facebook.
- Products on Facebook Shop are organized into collections, which are similar to your store categories. Collections are top-level only. Products from your sub/child categories will be grouped under the top-level collection in your Facebook Shop.
- A collection is automatically created for each of your top-level categories when you connect your store.
- New custom collections cannot be created, and existing collections cannot be edited on Facebook.
- To hide/show a collection or sort the products within it, enable/disable the store category or sort the products within the category.
You can use the catalog from your Facebook Shop to set up targeted ads within Facebook. Refer to Facebook Ads for more information and setup instructions.To deactivate a product in a Facebook catalog:
- Go to Facebook Catalogue Manager.
- Select your catalog.
- In the menu on the left, click Products.
- Tick products you want to hide from your catalog on Facebook and click Deactivate Delivery:
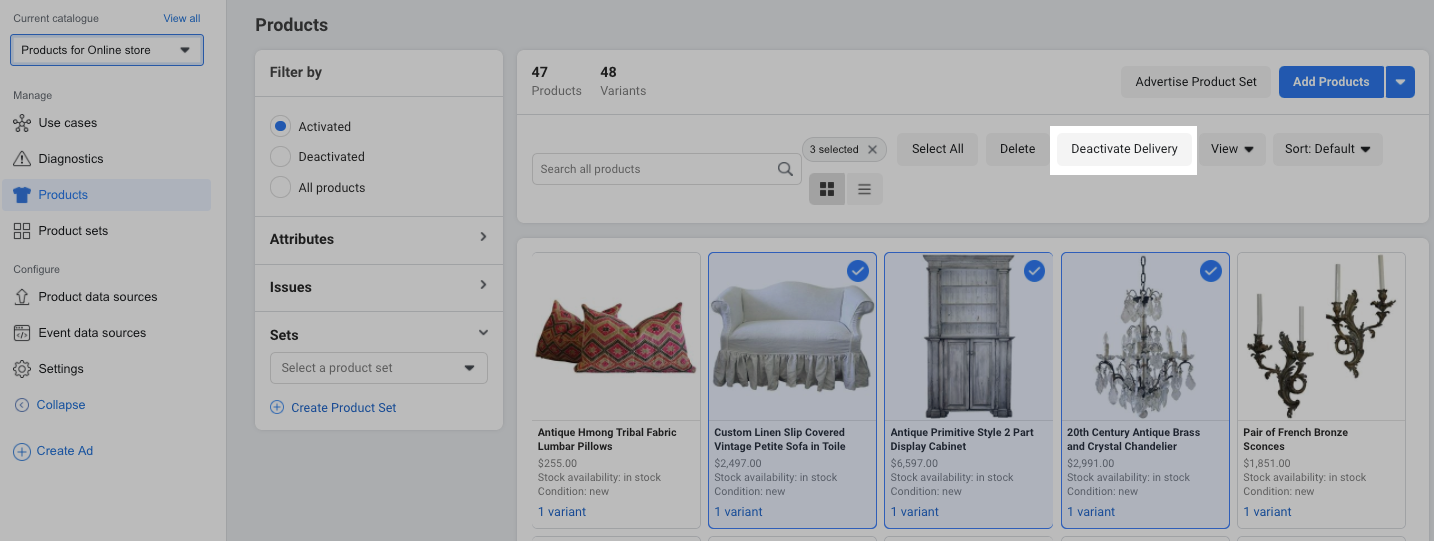
- Review the list of selected items and click Deactivate Delivery to confirm the action.
To hide the Shop tab on your Facebook business page:
- Go to Settings → Templates and Tabs.
- Click Settings next to the Shop tab.
- Switch off the toggle:

- From your store admin, go to Facebook.
- Click on the Status drop-down and choose Disconnect.
- From the app, go to Store → Facebook Shop.
- Click on the Status drop-down and choose Disconnect.
- From the app, go to Store → Facebook Shop.
- Click on the Status drop-down and choose Disconnect.
- On your Facebook business page.
- Go to Settings → Edit page located at the top right corner.
- Drag-and-drop the Shop tab where you prefer on the list of other tabs.

- Show the information about payment options in your storefront. For example, you can add the logos of the credit cards you accept to the description of your store front page or add it to your site footer using CSS.
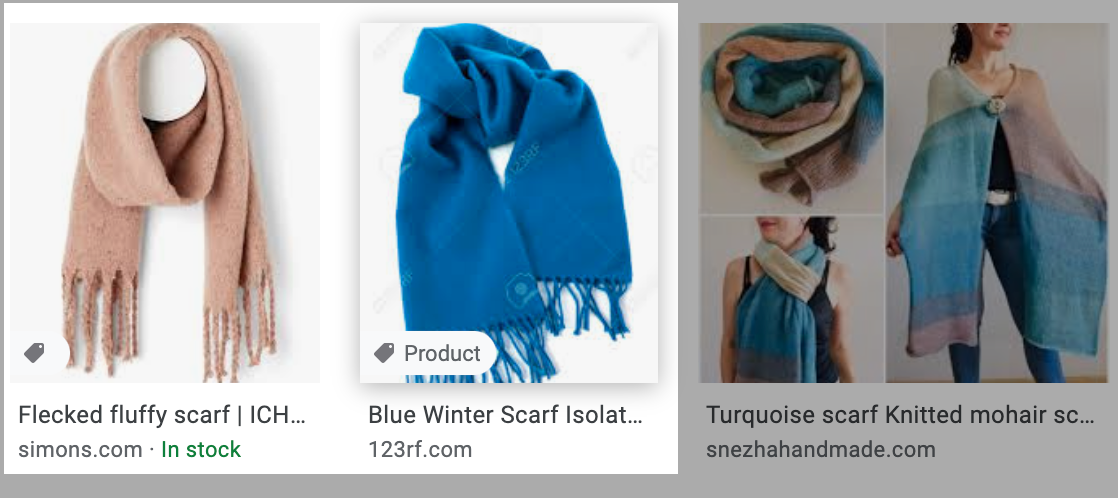
- Optimize your catalog. Google Shopping campaigns use your product feed to generate ads — they borrow images and pieces of descriptions from your catalog. For your ads to be a success, you can:
- Categorize products wisely in your store so that they sit in the right categories and subcategories;
- Optimize your product titles and descriptions for relevance by including high-value keywords into them;
- Use product images of high quality and free of watermarks in your store (it’s better if they are on white background).
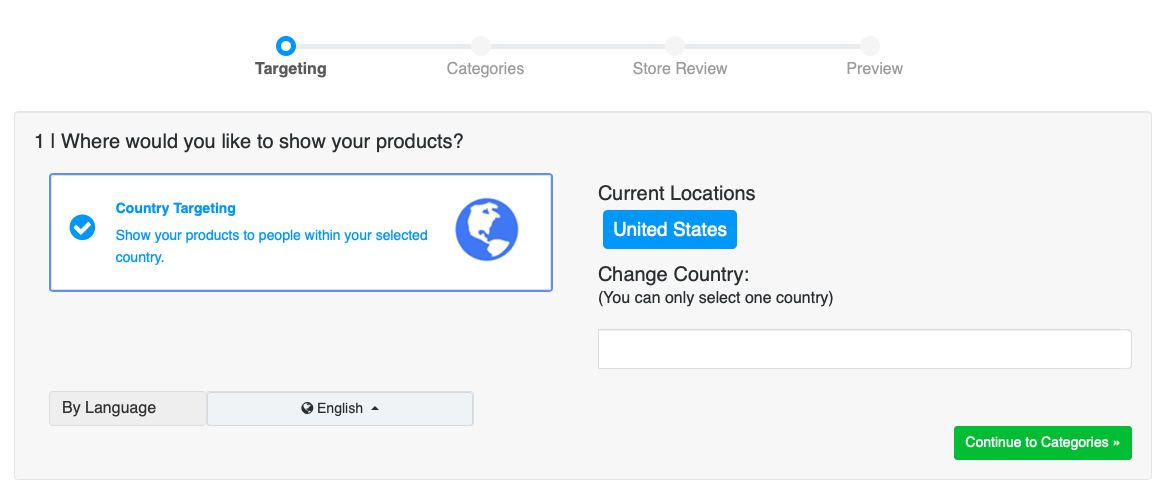
- Log into your DCC account, and select the E-Commerce tile.
- Click on the OMINICHANNEL tab, then select SELL ON GOOGLE.
- Click Continue to Categories. Pick the right Google category for your store to make sure your ad shows up in the right search results and select the condition of your products (New, Refurbished or Used). Example:
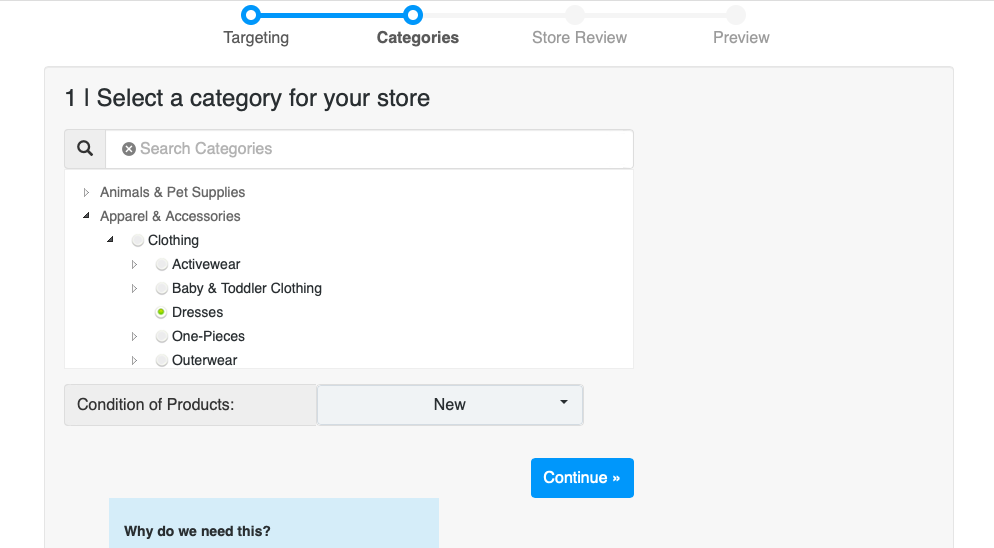
- Click Continue.
- Choose what products you want to advertise. If you don’t use categories in your store, all products will be automatically selected for ads. If you want to advertise specific products only, put them in categories in your store first and then select these categories for the campaign:
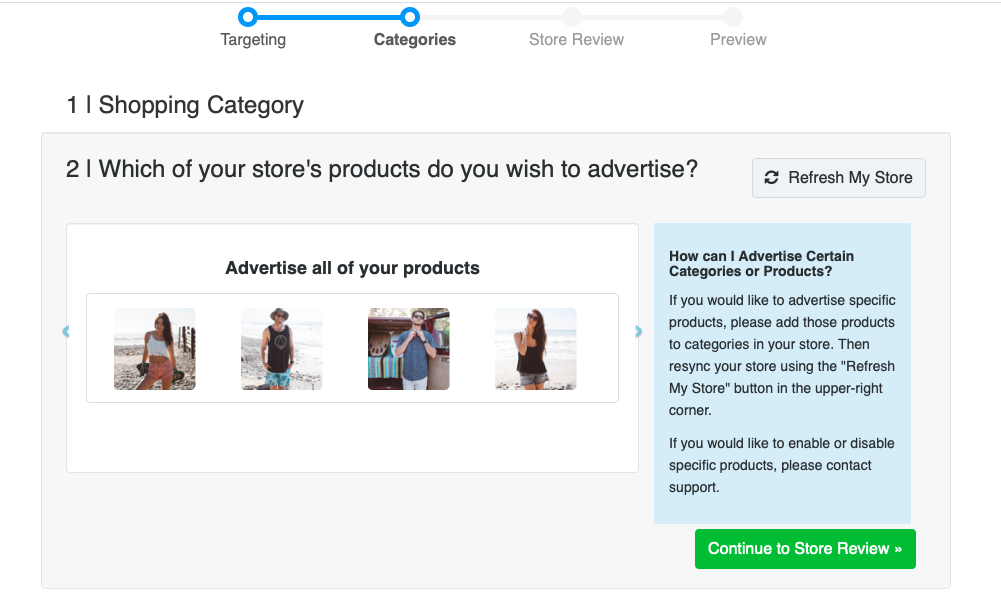
- Click Continue to Store Review.
- If any errors are indicated, click View Details and follow the instructions on how to fix them, then click the I fixed this, Refresh my store button.
- Click Continue to Preview to see how the ads will look like. Example:
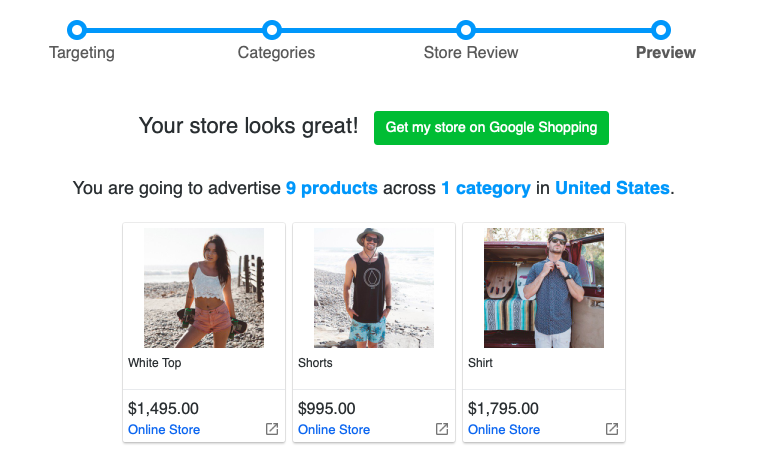
- Click Get my store on Google Shopping.
- Select the preferred package to launch your low-effort Google Shopping campaign.
- That’s it. Your ads have been created.
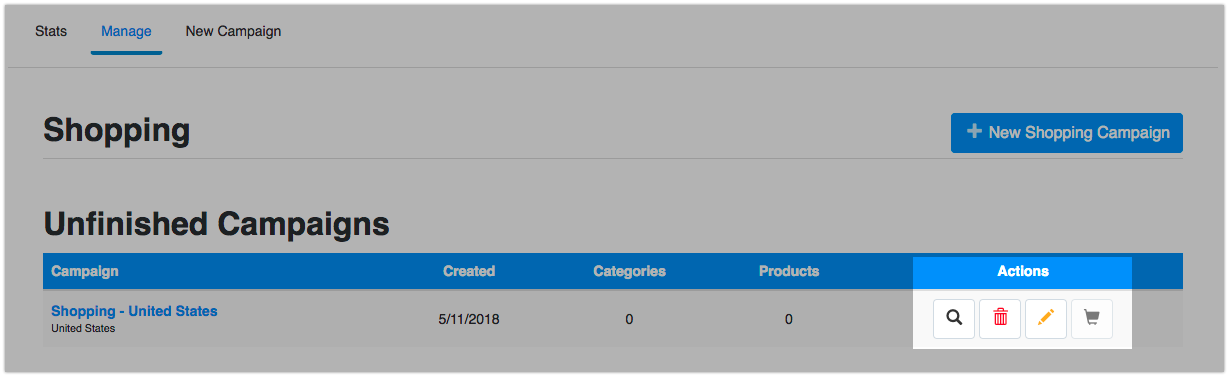 Note: Once you have created your first Google Shopping campaign, you may see a menu at the top of the setup page:
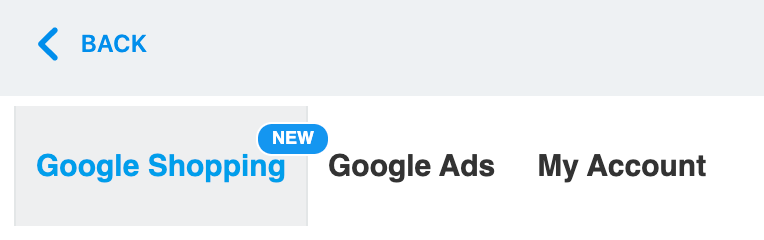
- it does not reflect the true position of your ad,
- each visitor will have a different result,
- it can negatively affect your campaign by generating impressions without clicks (this lowers your click-through rate),
- there are many common reasons why you may not see your ad, even though your stats are accruing.
- checking your Conversion tracking in Adwords account → Tools → Conversions,
- analyzing your Search term reports to ensure your bids are high enough to generate the correct search terms,
- making sure product titles accurately describe your product and search terms are included in the title and description.
- General
- Store Profile
- Format & Units
- Languages
- Cart
- Legal Pages
- Tracking & Analytics
- Destination Zones
- Shipping & Pick Up
- Taxes
- Payment
- Invoices
- Store Name
- Store Location
- Time Zone
- Company Name
- Company Email
- Address
- Address Line 2
- City
- State
- Country
- Phone
Collecting and nurturing leads is vital to getting the most out of your IDX. There are many built-in features in your account that require users to register and these are enabled by default. Additionally, you can optionally prompt users to register throughout their search experience using different actions on your site as trigger points.
To access your Lead Capture Settings, log in to your IDX control panel and navigate to Setup > Lead Capture > User Registration. The options in the section titled “Lead Capture Strength” allow you to decide on the level user convenience vs. quality of information when prompting your users to register.
- Off
Users can manually sign-up for Email Updates and the Property Organizer. - Ultra-Light (One Prompt)
Users can dismiss the registration prompt and continue searching and property viewing. The user will not be prompted again. - Ultra-Light (Multi-Prompt)
Users can dismiss the registration prompt and continue searching and property viewing. If dismissed, the user will be prompted again when the next trigger point is reached (see trigger points). - Light
Users must register when prompted, however, the email is not verified. After registering, the user can continue searching and property viewing. - Heavy
Users must register when prompted and an email is sent requesting activation. Once the account is activated, the user can continue searching and property viewing. This method ensures that the user has provided a valid email address.
You can set registration prompts to occur when using the search form, viewing results, and viewing property details.
When visiting one of these pages, a prompt can be triggered immediately or after visiting the page a number of times. For example, the user can be prompted to register after viewing a property once, twice, three times, etc.
In your CRM, you can track your leads’ stage in the business development pipeline and gauge the health of your sales funnel.
Hover over each section in the “Pipeline Status” chart to see what percent of your leads are in each individual pipeline stage.- Uncontacted
- Attempted Contact
- Nurturing
- Under Contract
- Closed (YTD)